Showing posts with label embellishments. Show all posts

Wednesday, August 25, 2010

Happy 65th Birthday (for the 29th time)! Another card-making idea for beginner scrapbookers.


Remember my post about birthday cards?  Well people, I've done it again.  Done what, you ask.  I've made another birthday card.  This isn't rocket science ~ and I'm hoping that my lovely readers have learned to deal with "questions o' rhetoric" and dryyy sarcasm.

Soooooo, this time, the lucky recipient is my fabulous (fabulous = classy, elegant, always ladylike) Nanny.  I think she's celebrating her 65th birthday for about the 29th time.  I wanted to create a card that showed my Nanny the two generations of lovely ladies who have learned so much from her and aim to follow in her ever-graceful footsteps.

Here are some simple steps to fabulosity...

1. Using Picnik.com, I chose to create a horizontal collage.  I found four pictures of Nanny, mom, myself and my sis and cropped them to similar size (2x2.5 - which is a particular setting on Picnik's cropping), then changed them to black and white.  All the photo editing was done right on the Picnik website. 

2. Then, still in Picnik, I created a collage.  This is really simple to do and is basically just drag-and-drop.  Picnik sets up the spacing and the cool black lines in between the photos.  Save.  Print.  *Love* 

3. Select the paper you want to use and fold it in half... again, I like top-to-bottom folding because it's easy to stand the card up.  Set your photo strip off-center for the cool artsy effect.


4. Add some whimsical words or phrases... The three I used came from a sticker set (yes, these are awesome stickers that look like typewriter font and are even somewhat embossed) on Scrapbuck.com for, you guessed it, about a buck.  Isn't life wonderful?

5. I also used my favorite butterfly punch and drew some squigglies and dots to give him some character.  Also note, the butterfly adds some repetition and coordinates with the butterfly image on the main paper.


6. Add a few more embellishments and dots.  I love little black dots (and little black dresses, and little black purses, but not little blackheads) -- they outline things really well without the harshness of a line.

ONE MORE THING:  Why is it that we make cards?  So we can give them away to people who will frame them and show them off in their house, of course. Try putting your beauuuutiful photos on the outside of the card; make it easier for the folks who are going to be displaying your wonderful creation.

Sunday, August 8, 2010

Best.Organizer.Ever: A beginner scrapbooker's dream.

For months I've searched for the perfect embellishment/tools/everything else organizer.  Friends, I have finally found one.  It's by Creative Options (who are not paying me to review this product, nor did they send me any swag) and it's basically a tackle box on crack. 


It's a multi-tiered self-contained box, sturdy but also light enough to carry around.

The main compartment contains three shelves which each house a smaller plastic organizer with compartments that can be altered to your needs.  Here is what the inside of each smaller orgainizer looks like...

Ribbons, ribbons, ribbons...

Letters, letters, letters...

Tape, buttons, and pens. 


And on the top, there is another large compartment for miscellaneous larger items that don't fit in the smaller units. 


Love, love, love.

Seriously. 

After much online searching, mental anguish, and overall hand-flapping, I found this little gem.  The website lists several retailers, or you can purchase online through Amazon.  But I wanted to see it for myself before making the purchase.  One day, I went wandering into Michaels (okay, so actually I drove several miles off the beaten path, on purpose) and right there in the front of the store, on the first shelf you see in the dead center, was the case.  And then (can I get an Amen?) I saw a 40% off sign.  I immediately ran over to the clerk and asked her to pinch me, I was for sure dreaming.  But nope.  I was just experiencing a rare moment of shopping bliss when you find the perfect item and IT'S ON SALE.  My debit card has never been swiped faster. 

THEN, I got to go home and dump out all my stuff all over the place and *RE-ORGANIZE* it all.  Cue angels singing and light shining down from heaven. 

This beginner scrapper has arrived!

Monday, August 2, 2010

You can picK you friends and you can picK your nose, but you can't picK your friend's nose: ScrapbooKing tips on exploiting the letter "K"


Here's an idea for a totally unique layout... try using a HUGE letter as the main background, and coordinate the title accordingly.  This "K" is actually a punch out from an alphabet kit that I have.  K happens to be my favorite letter... I'll give you one guess why. 

Anyway... I have a few prerequisites when choosing friends.  If your name starts with the letter K, you get to bypass some of those.  Luckily, my friend Kelsey's name starts with K, otherwise that girl would have never had a chance.  *Kidding, Kels.*  Kelsey notoriously picked me up at a nightclub about three years ago by complimenting my blonde curly hair.  I had spent the better part of an hour to get the "I totally don't care about my hair but it looks perfect anyway" look.  How could I not be friends with a girl that had such incredible taste? 

I figured it was about time I did a layout dedicated to my very bestie in the whole world.

Here's some specifics on this layout.  I chose very simple journaling... The pattern of the "K" is pretty busy and I wanted one elegant statement that says it all about Kelsey: "Beautiful inside and out."


For the fancy-shmancy ribbon underneath, just take a long strand of ribbon and use a glue dot roller to adhere one end.  Then continue to double it back on itself putting a dab of the glue dots on each fold so the ribbon stays put.  To create some dimension, don't glue the ribbon down completely, just glue a few key spots and the rest will stay nice and fluffy (like Kelsey's hair). 

Next, stick on some rhinestones... these gold and silver blings happen to work perfectly for a layout featuring Miss Kelsey, whose newest nickname (courtesy of another hot blonde, Melissa) is Sparkling Cosmo. 

We all know how addicted to flower embellishments I am... so here's a quadruple layered beauty for your viewing pleasure:


And now for the real fancy shmancy of the layout: the layered paper on the left. 


Here's how to do it. 

1) Cut a wide strip of patterned paper.  I picked black and white to coordinate with the "K" and also because I didn't want to detract from the flecks of yellow by picking another color. 

2) Choose a semi-transparent tissue-like paper and tear  a long strip.  This particular paper was given to me by Jacque who picked it up during her recent trip to Japan.  (Yaaaaaay for Jacque: she also knows how much I love receiving scrapbooking supplies as gifts.)

3) The reason for choosing a transparent paper is so that you can lay it on top of the patterned paper chosen in Step One.  The pattern will show through the transparent paper.  Adhere it to the patterned paper using glue dots or vellum tape, if it's super transparent.

4) Using the same patterned paper from Step One, cut a long skinny strip and lay it over the transparent paper.  This gives you a nice woven effect and tons of texture.

5) Slap that extra-large letter over the top, and you're done!  Unless, like me, you feel like your letter doesn't stand out quite enough (and I really wanted the "K" to P-O-P off the page), so I outlined the left side with a black marker.  Popping achieved.


And finally, some fun trivia about Kelsey:
1) She's a dancing machine.  I'm serious. A dancing MACHINE.
2) Her laugh is more contagious than pink eye in an elementary school.
3) She will listen for hours and hours, even if the same story is repeated 13 times.
4) She's a smart cookie and a dentist, to boot.

Love ya girlie, and miss you tons!

Thursday, July 29, 2010

Boxing isn't the only place for punches: beginner scrapbookers can receive them as gifts!!


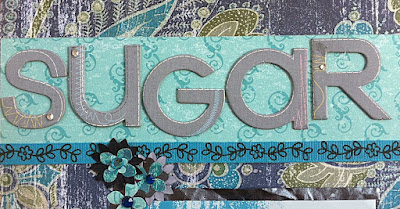
Do you know what makes me happy?  Scrapbooking (okay, scrapbooking while drinking wine and sitting on the couch next to my Sugar Pie).  Do you know what makes me jump up and down and clap my hands like a little girl?  Receiving scrapbooking supplies as gifts!  So imagine my delight when Matt's mom, Marsha, surprised me with not one, not two, not three, but FOUR punches.  I had used punches at the Scrapbook Expo back in May but they weren't the kind with levers and were pretty hard to punch.  They're also pretty pricey.  Ipso facto, KeKe no buy-o no punches.  HowEVER, KeKe receives punches like no other (perhaps I should be a cagefighter). 

Marsha is either: a) a secret scrapbooker; b) a seriously talented bargain shopper; c) extremely generous; or d) all of the above.  Ooh ooh!  I know, pick me, pick me.  She's "D" all of the above! 


The punches Marsha found for Miss Hannah and I to use were at Marshalls and literally a fraction of what you'd get them for at Michaels.  The kind she purchased were by Martha Stewart and have a lever on them -- making the punching very easy on your hands. 

So it just occurred to me that we have three very similar words in the above paragraph: Marsha, Martha, and Marshalls.  Coincidence?  I think not.  When this trio comes together, the stars align for some serious scrapbook pages.

Punches come in a variety of shapes, which makes for supercallafragalisticexpialembellishments.  These flowers were made using paper flowers (from Scrapbuck.com) and the punch shown above. 


Punches also come in patterns so that you can make cool borders around your photos.  (Also try trimming all around your main 12x12 page for a fabulous effect.)


I used this type of punch to make a fancy border for some fun photos of Matthew and I at the fair last summer.  I got the puncher a little too close to the green and it made some holes that I didn't want to be there... so I covered them up with blue rhinestones and presto-perfecto!  (Edger punches are a bit like using stamps... practice makes perfect, so try them out on some scratch paper first.)


For the title, I used chipboard letters by K&Company -- also purchased on Scrapbuck.com (for a whopping $1.50).  At that price, you can purchase a bunch of them rather than spending a bajillion dollars on a die cut machine, which by the way, requires you to also purchase cartridges for all the different fonts.  Way.too.expensive.for.KeKe.


I also chose to do journaling on a secret tab that I secured by placing it between the silver and blue photo mats (this means when you're gluing the mats together, leave a little space where there isn't any glue so the tab can slide in). 


What's written on the journal tab is between me and my Sugar Pie, but let's have a closeup of that ass-grab one more time for good measure:


Thank you Marsha, for the fabulous gifts and for actively contributing to my scrapbooking addiction.  ;-)  BTW, Miss Hannah absolutely loves them, too.

Now go forth and punch! 

Wednesday, July 7, 2010

If your dog doesn't like somebody, maybe you shouldn't either.


Here's a fabulous inspiration for a layout. 

Look at the call log in your phone (I'll just look on my new 4G, take that Dr. Pepper!) and figure out who calls you the most.  And then dedicate a WHOLE page just to them... sort of like an Ode to the Person Who Makes Me Feel Popular.  The winner for me: my awesome mom... who logged a total of ELEVEN calls to me yesterday (I just know that there must be some glitch in the iPhone software... eleven, really?).

Anywho.  Here's a page just for the special lady.  And the steps for the masterpiece:

1. Pick your pics. I took some of my very favorite pictures of her and luckily she was wearing red in all of them... and her favorite color is blue.  The pictures were all different sizes, and rather than refiguring the "perfect" photo size, I decided to do some patchwork and make the focal point the center of the page (rather than one specific photo).

2. Pick your paper. What comes next? You got it: coordinating paper to match the photos and add a personal touch by complimenting with her favorite color.  

*Let's focus on step 3*


3. Pick something personal. Find something that you either received from the person, or something that reminds you of them and incorporate it into the page.  Wacky Jacque (aka my mom) is notorious for sending funny notes to me in the mail.  She also has a knack for finding greeting cards that don't mean anything, but mean the world, at the same time.  So, I found two that I love (and one happened to be red... extra points for color coordination) and cut them to size.  

***Adding these types of touches is what truly makes layouts unique.*** 
There are tons of pre-fabricated layouts from which to choose, but when you add something that is yours, it becomes your masterpiece.  Aren't I brilliant?


4. Pick your nose.  Just kidding.  Step Four is: Pick some pretty petals...or some other embellishment for sparkle-factor.  I picked a little flower stamp and was able to use two different ink colors.  I'm still mastering this stamp thing, so I'm not going to go into too much detail (or do a post about it) until I can give you the Full KeKe. 


5. Pick up your Fiskars and start trimming.  To continue with the patchwork look, I decided to do two large angular shapes.  The patchwork of the photos is very squared off.  By adding some triangular shapes (and some diagonal flow) the square is somewhat broken up.  Once you've got the triangles cut, play around with the Fiskars by snipping off a few of the sides to create some negative space.

6. Pick up your pen.  Use the negative space created in Step Five to do some journaling... a perfect topic for journaling on this page would be a few reasons why that person is #1 on your call log.  In this case, it's because my mom thinks I'm so damn cool... for you, it might be because you have a stalker.  In either case, you have created a beeeeeeeautiful layout.  Congratulations. 

I would love to know: where do you get inspiration for unique layouts?

Wednesday, June 30, 2010

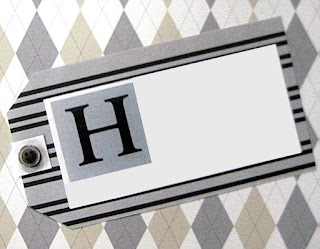
TAG You're It! Easy instructions on journaling tags for beginner scrapbookers.

As promised.... here comes *easy as pie* directions on how to make a cute tag for journaling.


Step One: Type or write your journaling first... this helps you measure other things later.  Try using plain white or lightly colored paper (or something with a very faint pattern... we don't want to distract from all that poetry now, do we?)

Step Two: Pick out the patterned paper you want as the background for your tag.  I chose stripes... funky stripes to match funky argyle.

Step Three: Find a cute little button.  (BTW people: my favorite place to get buttons is from all those annoying little button envelopes that come with new clothes.  Before I started scrapbooking, I used to keep mine in a little drawer... with the Martha-Stewart-like intention of actually sewing a button back on if one happened to fall off.  Instant killer of button-sewing homemaker skills?  Safety pins!  So what do we do with the buttons?  Glue them on scrapbook pages.  *Applause please.*)

Step Four: Cut out your journaling into a rectangular shape and decide how much bigger you want the tag to be... it can be a subtle 1/4 inch border, or more decorative and bold with a 1 inch or larger border.  (Don't adhere the journaling to the patterned paper yet.)

Step Five: Gently (without creasing) fold your patterned paper in half (hot-dog style).  Take some scissors and snip off the corners of one side at about a 45 degree angle.  The point of folding the paper is so the angles are identical.  I learned this the hard way.  Don't cut it all the way into a point; you're gonna want it to look like this:  


Step Six: Take a small snippet of the same paper you wrote your journaling on and cut a long skinny rectangle.  Use a glue dot to stick it on, leaving part of the rectangle hanging over the edge of the patterned paper, and then fold it around to the other side.

Step Seven: Use another glue dot to stick your button in the center of the rectangle from Step Five.  Adhere your journaling and you. are. done!

What do YOU like to use tags for?  Any other suggestions on techniques?


Beginner scrapbooking tip: I love using tiny tags to write the month and year.  This way, the tag doubles as a cute embellishment and will help jog your memory of when those photos were taken.