Monday, October 11, 2010

San Francisco Here I Come! Yayyyy! New Projects!

Attention: I have gotten my mojo back.  It's true.  Matt even gave me a high five for it.  And while I don't have time for a tutorial, I just wanted to show you a few things I've been working on...  Hope you like!

Here's a page from a recent trip to San Francisco for my madre's birthday... the coloring is showing up a bit funky, but the photos were edited using Picnik (duh) to get a grainy bluish effect.


And here's a few more from that same trip... showing us girls being, well, girls.  The patterns on this page are pretty busy, but totally appropriate for the funny photos.  Also, notice the strategically placed curly-ques!


BTW, can anyone name the movie that the above quote is from?


Friday, September 17, 2010

Do you wanna hear something really sad?

I have not scrapbooked for over two weeks.  I'm past the withdrawal stage and now I'm just numb.  I still dream of patterned paper, satin ribbons, and piles of buttons.  But my fingertips no longer contain the remnants of glue dots and the floor beneath my feet no longer has scraps of paper upon it.

Why haven't I scrapbooked for over two weeks?

I'm not really sure... I think scrapbooking was filling a void over the past several months.  That void was not feeling satisfied with my job, not feeling like I had a "creative" outlet at work.  Now?  I create all day long every day.  My brain is overflowing with thoughts, challenges, and ideas.  It's a bittersweet feeling.  I love scrapbooking.... but I love my job, too.  And it's very satisfying to know that this brain (big brain) is tapped out at the end of the day now.  Joy and sorrow, all wrapped up in one.

But.... a glimmer of light....

My patterned paper will wait for me.  My Fiskars paper trimmer will stay sharp.  My button collection will remain abundant.  And my love for all things scrapbooking will NEVER go away.  Maybe my scrapbook brain is just taking a nap for a little while.... sleep tight Kreate by KeKe brain.... WAKE up Ebsi Websites KeKe.

Here are a few favorites of the past year.


Thursday, September 9, 2010

Sometimes they're demanding.... Picking and choosing your scrapbook subjects.


People you love belong on the pages of your scrapbook.  But sometimes they get demanding... very demanding.  A few weeks ago, I sent my sister a text message and told her that her dog Jax was going to be the next featured "person" in my scrapbook.  I thought she'd be delighted... I thought she'd be flattered... I thought she'd be the proudest mommy of the ugliest chihuahua there ever was.

I was wrong.

The text message I got in return went something like this: Why does my dog get his very own page before I do?!

Point taken.

And so, without further ado, here is Caitlin's very own page.  Oh yeah, she's kinda gorgeous, isn't she?


My beautiful baby sister... loves to sit on benches with monkeys.


My beautiful baby sister... is the most artistic person I know.


My beautiful baby sister... looks amazing perched atop paper flowers!


Love you CK!

Wednesday, September 8, 2010

A blog post featuring... drum roll please.... ME!

Here's a little snippet from my "day job"... doesn't it just sound miserable?


If you don't drink coffee, can you still eat it? Random questions and RELEVANT suggestions regarding blogging communities.


Friends, throughout my long history at ebsi, this question has plagued the good people of this company.  But do we really want to talk about coffee today?  I don't.  What do I want to talk about?  I'm SO glad you asked!

Today I want to discuss blogging communities.  There are literally thousands of these.  When I started blogging awhile back, I asked my friend Kalyn (who writes a south-beach friendly foodie blog called Kalyn's Kitchen) how to tap into relevant sectors of the blogosphere.  Her advice (which I avidly followed... she has over 15,000 feedburner subscribers) was to tap into blogging communities that relate to you blog's niche.


Here's an example.  I write a scrapbooking blog called Kreate by KeKe.  There is a blogging community that is exclusively dedicated to arts and crafts called Creating the Hive


"The Hive" (as it's called by it's fabulous members) is a place where professionals and hobbyists alike can import their blogs, share content, and build relationships with others who share their interests.  Simply.an.amazing.idea!

Here is your homework for the day:
1. Hop on over to Google
2. Enter "{your blog niche here} blogging communities"
3. Browse away!
4. Look for communities that have a lot of activity and users... but not such high numbers that you'll get lost in the mix.  The key is to build relationships so that you can share blogging tips with others who love your niche just as much as you do. 

Sorta reminds me of the phrase: Birds of a feather flock together!


Happy blogging!

Wednesday, September 1, 2010

Where's KeKe?

What could be better than blogging? 
What could be better than scrapbooking?
What could be better than blogging about scrapbooking?

I'll give you four choices:
a) Endless chips and salsa
b) 75 and sunny every.single.day
c) Getting a job where you get paid to blog, binge on social media, and teach people
d) All of the above

I will save you from the suspense.  The answer is D.  The reality is C.

What the "h" "e" double-hockey stick does that mean?

Friends, I have gotten my dream job with a website/blog-design/graphic-guru/social-media company.  The good news: KeKe might just be the happiest camper in the western blogosphere.  The bad news: blogging posts will be much less frequent. 

...to be continued...

Wednesday, August 25, 2010

Happy 65th Birthday (for the 29th time)! Another card-making idea for beginner scrapbookers.


Remember my post about birthday cards?  Well people, I've done it again.  Done what, you ask.  I've made another birthday card.  This isn't rocket science ~ and I'm hoping that my lovely readers have learned to deal with "questions o' rhetoric" and dryyy sarcasm.

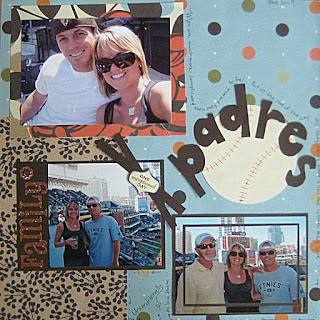
Soooooo, this time, the lucky recipient is my fabulous (fabulous = classy, elegant, always ladylike) Nanny.  I think she's celebrating her 65th birthday for about the 29th time.  I wanted to create a card that showed my Nanny the two generations of lovely ladies who have learned so much from her and aim to follow in her ever-graceful footsteps.

Here are some simple steps to fabulosity...

1. Using Picnik.com, I chose to create a horizontal collage.  I found four pictures of Nanny, mom, myself and my sis and cropped them to similar size (2x2.5 - which is a particular setting on Picnik's cropping), then changed them to black and white.  All the photo editing was done right on the Picnik website. 

2. Then, still in Picnik, I created a collage.  This is really simple to do and is basically just drag-and-drop.  Picnik sets up the spacing and the cool black lines in between the photos.  Save.  Print.  *Love* 

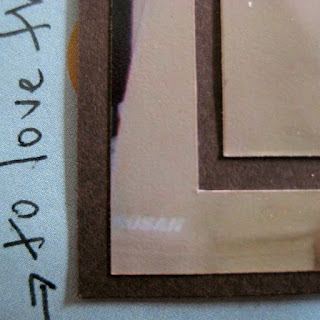
3. Select the paper you want to use and fold it in half... again, I like top-to-bottom folding because it's easy to stand the card up.  Set your photo strip off-center for the cool artsy effect.


4. Add some whimsical words or phrases... The three I used came from a sticker set (yes, these are awesome stickers that look like typewriter font and are even somewhat embossed) on Scrapbuck.com for, you guessed it, about a buck.  Isn't life wonderful?

5. I also used my favorite butterfly punch and drew some squigglies and dots to give him some character.  Also note, the butterfly adds some repetition and coordinates with the butterfly image on the main paper.


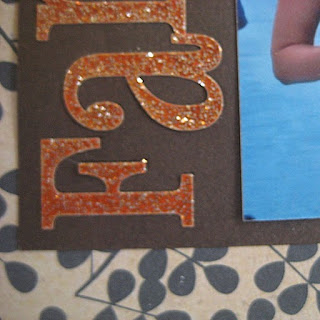
6. Add a few more embellishments and dots.  I love little black dots (and little black dresses, and little black purses, but not little blackheads) -- they outline things really well without the harshness of a line.

ONE MORE THING:  Why is it that we make cards?  So we can give them away to people who will frame them and show them off in their house, of course. Try putting your beauuuutiful photos on the outside of the card; make it easier for the folks who are going to be displaying your wonderful creation.

Tuesday, August 24, 2010

Discreet Journal Pockets for Beginner Scrapbook Pages

On Valentine's Day this year, Matt's mom asked her kids write "love-grams"... She hired this hilarious actor to come to dinner dressed as a cupid and sing love songs and distribute the love-grams.  I kept the love-grams that Matt & I received, knowing that they would make a really great scrapbook page addition (and to help jog my memory of that awesome evening).  Thanks Marsha, for being a wonderful host and putting it all together!


If you remember from my post "Scrapbook Kits & Coordinating Paper", I discussed velum tear-outs as one way to create a title.  In this layout, I took that idea one step further and created a pocket to hold those love-grams.  Here is the two-page spread (grrrr... I obviously had not yet learned my lesson about being a beginner scrapbooker and the difficulty of two-page layouts).  Instructions for the pocket are below.


The other details of this page are pretty basic, so let's focus on the vellum pocket.  (BTW:  Vellum is slightly transparent, foggy looking paper that can be plain, or, in the scrapbooking world, come with cute pictures or sayings.)


1. I picked up a spiral book of vellum quotes at Michael's (approx. $7).  They have books for all occasions.  It's also smart to buy vellum tape which allows you to adhere the vellum paper without the adhesive showing through (approx. $4).
2. I picked a coordinating paper (for beginner coordinating paper tips, see Scrapbook Kits & Coordinating Paper) to serve as the back of the pocket. 
3. Measure how big the front of the pocket needs to be based on what needs to go inside.  Make sure you leave some flaps to wrap around the two sides to the back, and fold under the bottom.  Use your trimmer accordingly.  Crease the flaps well.
4. Finally, adhere the flaps to the back of the pocket using your choice of adhesive (note: vellum tape is not necessary here because the part that you are adhering will be on the unseen backside of the pocket).  Insert love-grams or any other special note!

To finish of the page, I added heart shaped embellishments and journaling in the center (made using a circle-cutter and by sewing a ribbon around the circle... more on those techniques later.)


Beginner scrapbooking tip: Pockets are a creative spot to discreetly place notes or journaling that has special meaning, and perhaps that you don't necessarily want everyone to read.

Friday, August 20, 2010

Friday Flip Offs!


Yay! It's Friday and I'm ready for my flips!!!  Thanks Gigi at Kludgy Mom.... this has become one of my favorite and most therapeutic weekly posts.  FYI, Gigi has created a 6-week course to improve your blog and guess what?  It's FREE-NINETY-FREE!  Check it out for sure... it starts in a few weeks and should be very informative and helpful.

Flip #1: Waking up at 5:00 a.m. unable to remember a particular actress in this movie.  WTH?  Who even cares?  Why would this be something that I just HAD to know at 5 in the morning.  BTW, the actress was Claire Forlani... but Flip Off to my brain!

Flip #2: To my veggie garden.  I planted you FOREVER ago... you were a "salsa" garden... I planted all the seeds at the same time.  How was I to know that the peppers would take 3 months longer than the cilantro?  Flip Off.

Flip #3: To the lady who was going 10 under the speed limit, then decided to turn her signal on for about 1/4 mile, then turned it off... I passed you and you were busy texting.  Really?  FLIP OFF

Flip #4: To summer.  Thanks for showing up.... in August.  Glad to have you back... now that it's nearly Fall.  Where have you been sunshine?  You're late to your own party.  Flip Off.

Everyone pleeeeease link up... and Hive readers, please post your flips in the comment box!  Happy Friday!

Thursday, August 19, 2010

Black & White & "Read" All Over: Simple but bold cards for beginners.


Try making a card using a photo(s) on the front.

I made this card for my sweetie for our anniversary... Here's to one year... and many more to come.  I wanted the card to be elegant, dramatic, and to make a bold statement.  And considering the recipient is a dude, I decided flowers and butterflies might not be appropriate. 

I lightened the exposure a bit on this picture using Picnik, but it didn't show up too well when I took a picture of the card with my iPhone, but you get the idea.  The black background with a bright photo gives some nice contrast.

Obviously this is the same photo, but I printed it twice and chopped part of our heads off.  It feels sorta weird cutting your own face in half. 

I like to make the text of my cards simple.  Hallmark has tons of cards with beautiful language, but in the end, don't you really just want to say "I love you. I mean it."?  That's the point.  I love you.  I mean it.  There you have it.  Done deal.  Finito. 


BTW, I got the idea for this card from Lizzy Kartchner's book 52 More Scrapbooking Challenges.  It's my absolute fav.  She had the suggestion of printing the same photo twice... brilliant!

More simplicity and black/white was in order for the inside of this card.  I wrote the gushy stuff on the inside of the card, which is for Matthew's eyes only... but I also put a cute little tag with our "love date". And, always a fan of repetition, I added another bold statement in the same font as was used on the front.


June 15, 2009:  That was a really good day.

Wednesday, August 18, 2010

Fancy Photo Borders for Beginner Scrapbookers

One of the ways novice scrappers can begin fancying up their pages is by creating cool borders and mats for photos. This next page showcases an awesome day at the Padres game with my three favorite guys: Matthews, my dad, and my brother.
The beginner kit that I bought included some fun stickers (see the "family" sticker). I really wanted this sticker to stand out on the page, but it sorta blended in with the other colors that were on the background and block papers. So I decided to extend the dark brown photo mat on one side in order to accomodate the sticker... easy, but so effective!

The next border I did was a little trickier. Now normally, I don't measure my photo mats to precisely fit the photo -- I'm just not that patient. "Eyeing" it usually works just fine. But for this mat, I had to measure because I was actually cutting the photo. Here are the steps:

1. Measure 1/2" around all sides of the photo and draw a connecting line on the back of the photo (ends up looking like a box).
2. Measure another 1/8" from where the line is towards the middle of the photo and draw another line (now you've got one box inside the other).
3. The space you have between the two boxes is what you'll be cutting out.
4. Use your trimmer to cut on the lines - being extra careful to keep the outer border in tact.
5. Select how much of the mat you'd like to extend beyond the photo (then trim the mat accordingly) and use your glue dots to stick in place. Tada!
6. If you are a measurer by nature, follow this link for some fantastic tips: http://scrapbookingforbusymoms.blogspot.com/

Finish up the page with some "home-grown" embellishments -- like having your artistically-inclined boyfriend draw a baseball for you, hand-drawing bubble letters old-school style and cutting them out (yes, I know some of the pen lines are visible), and use that left over brown mat paper to make a cute "x" shape behind a pre-cut dimensional sticker.


Novice tip: Many of the other fabulous blogs out there are for more advanced scrappers who have invested quite a bit of money into die-cut machines and the like. For us novices, if we hone in on some of those scissoring and lettering techniques we learned in grade school, we can actually end up with some pretty cool looking layouts... and for a fraction of the price. Being the impatient Aries that I am (year of the Rooster, too... I'm doomed), I'm always in a hurry to have all the "stuff" needed for decadent layouts. But I think any scrapper would agree, using whatcha got aint all that bad either!
Another novice tip: Journalling doesn't have to take place in a conventional box. On this page, I scrawled some thoughts and wrapped them all around the page.

Monday, August 16, 2010

A little faith...


Sometimes you gotta just have a little faith... I'll take a lesson in faith from sweet Bun Bun, perched in the bicycle basket, high, high, high above the ground. 

I need some faith right now... Faith that my life path is headed in the right direction... Faith that every dark moment leads to something light... Faith that the universe is aligning the way it should... Faith that I'll never forget lessons of humility.

So I'll learn from my Bunny, I'll perk up my ears, I'll keep my eyes open for what lies ahead, and I'll be sure to hold on tight, because it might be a bumpy ride.


Faith, hope, love.
~ KeKe ~

Sunday, August 15, 2010

So many mistakes, so little time... Embracing mistakes as a beginner scrapbooker

Oopsie daisy.


I made so many mistakes on this page.  Can you tell?  Here, I'll point them out to you and show you how I covered them up... or didn't, in some cases.

First of all, I made this page for my mini-scrapbook dedicated to Bunny.  That scrapbook is tiny, like 5"x5".  So how big did I make this page?  8"x8", because duh, an 8 inch page will for sure fit into a 5 inch sleeve.  Not so much, actually.  So, now I need to make it into a 12x12 page, but that's for another day.

2nd mistake: I used a little black marker to trace the scalloped edge and I went out of the lines twice.  I'd for sure be kicked out of 1st Grade for this type of error.  But *tada*!  I covered up the mistake using a heart! 


3rd mistake: I used an edge puncher for the photo mat and have QUITE obviously not mastered the skill of making the corners match up.  I didn't fix this mistake.  I.didn't.even.try.so.there.


I also went out of the lines on the bottom scalloped edge.  Let's highlight that mistake with a big yellow arrow.  Quick fix: put a flower stem close to the mistake... sorta like the "taking your eye off the ball" theory.  In law, we call that a red-herring.  (Gagging that I know what that means, and gagging that I used a legal expression on a scrapbooking blog.)


So people.  The short but sweet lesson for today: Embrace mistakes, hide mistakes, don't hide mistakes, whatever you do with them, mistakes are part of what makes paper scrapbooking unique.  I never said I was perfect.  But, if you were thinking I was, just stay in that dreamland... it's a warm, happy place... I'm there myself.


Today I'm linking up with Christine at MBC Scrapbooking!


Thanks for hosting a crafting link party, Christine!  Please link up if you have a craft or DIY project.  Don't forget to add Christine's button!!  Happy Thursday =)