So, I know that I've done a previous post about card making... but I wanted to do another one that's a bit more detailed. Matt's stepdad just celebrated his birthday on July 4th (what a fun birth date, right!) and I wanted to make him a personalized card. Frankly, for personalized cards, I like them to be simple and elegant. And this is my blog, so that's what I'm going to talk about.
1. Find the paper that you want to use for the card and fold it in half. I like to fold it top to bottom, rather than sideways, because it stands up easier. This step is important because as you're laying out your elements, you want to see how much space you have to work with.
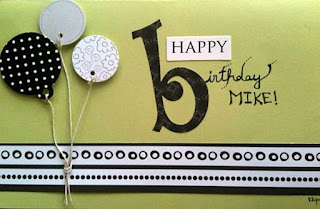
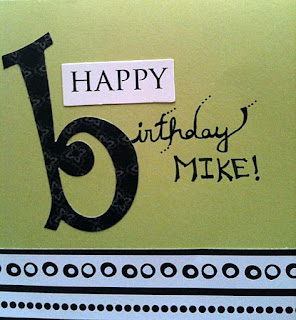
2. Pick a title for your card. I liked "Happy Birthday"... It's simple and to the point. Matthew is the one who suggested adding Mike's name, for a more personal touch. I told Matthew, "Great suggestion, honey. Keep it up and I'm going to turn you into a real live scrapbooking machine." He ran away. Anyway, I loved his idea and it definitely made the card. The "HAPPY" is a punch-out from the Colorbok Nocturne collection. The "b" is also Colorbok (XY&Z collection). Both are from scrapbuck.com.
***FYI: Punch-out kits are won.der.ful. Why? Because they include tons more than if you just buy an alphabet kit. They come with tags, photo frames, borders, paper embellishments, and fun words to add to your pages. And on scrapbuck they are under $5.00. Can I get a "woo-hoo"?!
I chose to handwrite the rest to give it a personal touch. Play around with different types of lettering (cursive, all caps, etc.).
3. Decide on some embellishments. I was looking through my stash and saw these circular punch-outs (by Best Occasions - a FABULOUS kit). These punch-outs are typically used for tags, but I thought they'd double as balloons rather nicely. I hunted down some string in the black hole (oops, I mean garage) to finish off the balloon look. Here's a tip when using nylon string: after cutting, burn the edges a bit with a match to prevent fraying. Another tip: when it comes to embellishments, odd numbers always tend to be a bit more visually appealing, as well as using different sizes.

4. As you can see from the very first picture, I put a patterned strip near the bottom of the card. The strip came from a regular piece of 12x12 patterned paper (trimmed to perfection by my trusty Fiskars)... and I liked how the circles and dots coordinated with the polka-dot balloon. There's no trick to perfectly laying out the elements on a card. You just have to play around until it looks good. Rearrange things a few times before gluing them down. And if you happen to have someone else around, tell them you'll give them a free high five if they tell you their opinion (a free high five might just be the best gift ever).
5. For the inside of personalized cards, I always like to use a picture of me and the card recipient (so they'll ALWAYS remember my awesomeness). Give the photo some bling by adding a border/frame. The border for this photo came from the same Best Occasions kit.

6. For the personal note inside the card, add some flair by using a large letter (an "M" for Mike). You can also add some snazzy buttons or borders (I added another black and white strip to the inside of the card at the very top).
7. THIS STEP IS KEY: For the personal note, I suggest using a totally separate piece of paper and cutting it to fit. That way, you can write your message and glue it to the inside of the card (use a glue dot roller cuz it's nice and flat). There's nothing worse than ruining your entire card by writing directly on the inside and messing it up in some way.
What an amazing creation... and another satisfied customer! Happy Birthday Mike!!

Do you make personalized cards? What's your favorite thing to add to cards to make them unique?
No comments:
Post a Comment
Thanks for leaving a comment!
Note: Only a member of this blog may post a comment.