Showing posts with label tags. Show all posts

Thursday, August 19, 2010

Black & White & "Read" All Over: Simple but bold cards for beginners.


Try making a card using a photo(s) on the front.

I made this card for my sweetie for our anniversary... Here's to one year... and many more to come.  I wanted the card to be elegant, dramatic, and to make a bold statement.  And considering the recipient is a dude, I decided flowers and butterflies might not be appropriate. 

I lightened the exposure a bit on this picture using Picnik, but it didn't show up too well when I took a picture of the card with my iPhone, but you get the idea.  The black background with a bright photo gives some nice contrast.

Obviously this is the same photo, but I printed it twice and chopped part of our heads off.  It feels sorta weird cutting your own face in half. 

I like to make the text of my cards simple.  Hallmark has tons of cards with beautiful language, but in the end, don't you really just want to say "I love you. I mean it."?  That's the point.  I love you.  I mean it.  There you have it.  Done deal.  Finito. 


BTW, I got the idea for this card from Lizzy Kartchner's book 52 More Scrapbooking Challenges.  It's my absolute fav.  She had the suggestion of printing the same photo twice... brilliant!

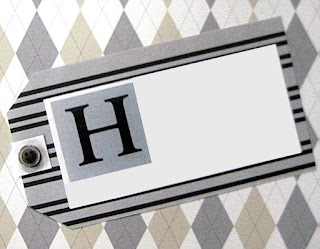
More simplicity and black/white was in order for the inside of this card.  I wrote the gushy stuff on the inside of the card, which is for Matthew's eyes only... but I also put a cute little tag with our "love date". And, always a fan of repetition, I added another bold statement in the same font as was used on the front.


June 15, 2009:  That was a really good day.

Thursday, July 29, 2010

Boxing isn't the only place for punches: beginner scrapbookers can receive them as gifts!!


Do you know what makes me happy?  Scrapbooking (okay, scrapbooking while drinking wine and sitting on the couch next to my Sugar Pie).  Do you know what makes me jump up and down and clap my hands like a little girl?  Receiving scrapbooking supplies as gifts!  So imagine my delight when Matt's mom, Marsha, surprised me with not one, not two, not three, but FOUR punches.  I had used punches at the Scrapbook Expo back in May but they weren't the kind with levers and were pretty hard to punch.  They're also pretty pricey.  Ipso facto, KeKe no buy-o no punches.  HowEVER, KeKe receives punches like no other (perhaps I should be a cagefighter). 

Marsha is either: a) a secret scrapbooker; b) a seriously talented bargain shopper; c) extremely generous; or d) all of the above.  Ooh ooh!  I know, pick me, pick me.  She's "D" all of the above! 


The punches Marsha found for Miss Hannah and I to use were at Marshalls and literally a fraction of what you'd get them for at Michaels.  The kind she purchased were by Martha Stewart and have a lever on them -- making the punching very easy on your hands. 

So it just occurred to me that we have three very similar words in the above paragraph: Marsha, Martha, and Marshalls.  Coincidence?  I think not.  When this trio comes together, the stars align for some serious scrapbook pages.

Punches come in a variety of shapes, which makes for supercallafragalisticexpialembellishments.  These flowers were made using paper flowers (from Scrapbuck.com) and the punch shown above. 


Punches also come in patterns so that you can make cool borders around your photos.  (Also try trimming all around your main 12x12 page for a fabulous effect.)


I used this type of punch to make a fancy border for some fun photos of Matthew and I at the fair last summer.  I got the puncher a little too close to the green and it made some holes that I didn't want to be there... so I covered them up with blue rhinestones and presto-perfecto!  (Edger punches are a bit like using stamps... practice makes perfect, so try them out on some scratch paper first.)


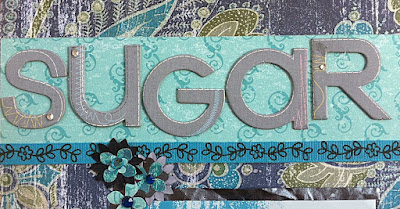
For the title, I used chipboard letters by K&Company -- also purchased on Scrapbuck.com (for a whopping $1.50).  At that price, you can purchase a bunch of them rather than spending a bajillion dollars on a die cut machine, which by the way, requires you to also purchase cartridges for all the different fonts.  Way.too.expensive.for.KeKe.


I also chose to do journaling on a secret tab that I secured by placing it between the silver and blue photo mats (this means when you're gluing the mats together, leave a little space where there isn't any glue so the tab can slide in). 


What's written on the journal tab is between me and my Sugar Pie, but let's have a closeup of that ass-grab one more time for good measure:


Thank you Marsha, for the fabulous gifts and for actively contributing to my scrapbooking addiction.  ;-)  BTW, Miss Hannah absolutely loves them, too.

Now go forth and punch! 

Monday, July 26, 2010

Angle-licious! Tilting your way to beautiful beginner scrapbooking layouts.


Remember how I said asymmetry is the new black?  Well, I meant it.  And tilting is the new asymmetry.  Are you confused yet? 

Here's the beauty of asymmetry and tilting: they can make a layout look really fancy and you don't need to use a lot of embellishments in order to get a really dynamic look. This tilted layout idea was suggested in 52 More Scrapbooking Challenges.

For this layout, I used one large piece of brown paper to mat all three photos.  The photos themselves are aligned straight on the brown paper, but the brown paper is tweaked just a bit on the pink paper.  To compliment the angle of the brown paper, I snipped off long skinny triangles. 


You can see that after I cut the triangles, I set them away from the rest of the brown paper just slightly.  If you are using a paper that has a pattern on it, make sure to line the pattern up when you glue down your triangles. 

These photos make me realize how lucky I am to have such an amazing family.  The pictures were taken by the San Diego Harbor and we went to see Nora Jones in concert later that evening.  (Nora Jones, BTW, is incredible live.)  I loved, loved, loved that evening.  *Ahhh, tear.*

Okay, enough with the sentimentality.  Scrapbooking isn't for the faint-hearted. ;-)
  
Try angling some of your other items, too.  The title (see above) is diagonal, as are the journaling tags.


Finalize with some embellishments.  Again, the focus on a layout like this one is the tilting... you don't want to detract from your amazing angle work with a bunch of embellishments, do you?  No.you.do.not.young.grasshoppa.  Embellishments can truly come from anywhere... Buttons (which are my favorite) tend to always accompany new clothes.  I don't know about you, but I typically don't just randomly lose buttons on clothes, so I have a huge stash of them.  Plus, they are super cheap to buy from craft stores... or you can just go shopping and buy a bunch of new clothes - for the sake of acquiring buttons, of course.  I also took apart some awesome 80's earrings (courtesy of mama Jacque) and glue-dotted those bad boys right next to the buttons.  Simple but chic.  Just my style.


So what do you think?  Do you like the angled look? 

Wednesday, June 30, 2010

TAG You're It! Easy instructions on journaling tags for beginner scrapbookers.

As promised.... here comes *easy as pie* directions on how to make a cute tag for journaling.


Step One: Type or write your journaling first... this helps you measure other things later.  Try using plain white or lightly colored paper (or something with a very faint pattern... we don't want to distract from all that poetry now, do we?)

Step Two: Pick out the patterned paper you want as the background for your tag.  I chose stripes... funky stripes to match funky argyle.

Step Three: Find a cute little button.  (BTW people: my favorite place to get buttons is from all those annoying little button envelopes that come with new clothes.  Before I started scrapbooking, I used to keep mine in a little drawer... with the Martha-Stewart-like intention of actually sewing a button back on if one happened to fall off.  Instant killer of button-sewing homemaker skills?  Safety pins!  So what do we do with the buttons?  Glue them on scrapbook pages.  *Applause please.*)

Step Four: Cut out your journaling into a rectangular shape and decide how much bigger you want the tag to be... it can be a subtle 1/4 inch border, or more decorative and bold with a 1 inch or larger border.  (Don't adhere the journaling to the patterned paper yet.)

Step Five: Gently (without creasing) fold your patterned paper in half (hot-dog style).  Take some scissors and snip off the corners of one side at about a 45 degree angle.  The point of folding the paper is so the angles are identical.  I learned this the hard way.  Don't cut it all the way into a point; you're gonna want it to look like this:  


Step Six: Take a small snippet of the same paper you wrote your journaling on and cut a long skinny rectangle.  Use a glue dot to stick it on, leaving part of the rectangle hanging over the edge of the patterned paper, and then fold it around to the other side.

Step Seven: Use another glue dot to stick your button in the center of the rectangle from Step Five.  Adhere your journaling and you. are. done!

What do YOU like to use tags for?  Any other suggestions on techniques?


Beginner scrapbooking tip: I love using tiny tags to write the month and year.  This way, the tag doubles as a cute embellishment and will help jog your memory of when those photos were taken.