Tuesday, July 6, 2010

Personalized cards make people smile... and that makes ME smile!

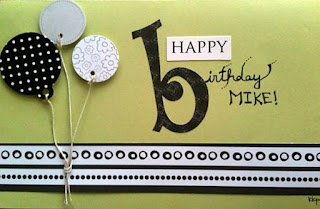
So, I know that I've done a previous post about card making... but I wanted to do another one that's a bit more detailed. Matt's stepdad just celebrated his birthday on July 4th (what a fun birth date, right!) and I wanted to make him a personalized card. Frankly, for personalized cards, I like them to be simple and elegant.  And this is my blog, so that's what I'm going to talk about.  

1. Find the paper that you want to use for the card and fold it in half. I like to fold it top to bottom, rather than sideways, because it stands up easier. This step is important because as you're laying out your elements, you want to see how much space you have to work with.

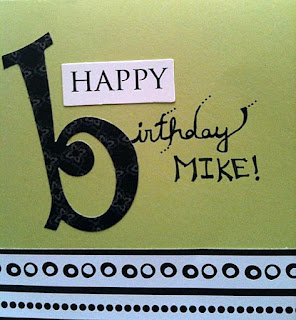
2. Pick a title for your card.  I liked "Happy Birthday"... It's simple and to the point. Matthew is the one who suggested adding Mike's name, for a more personal touch. I told Matthew, "Great suggestion, honey.  Keep it up and I'm going to turn you into a real live scrapbooking machine." He ran away. Anyway, I loved his idea and it definitely made the card. The "HAPPY" is a punch-out from the Colorbok Nocturne collection. The "b" is also Colorbok (XY&Z collection). Both are from scrapbuck.com. 

***FYI: Punch-out kits are won.der.ful. Why? Because they include tons more than if you just buy an alphabet kit. They come with tags, photo frames, borders, paper embellishments, and fun words to add to your pages. And on scrapbuck they are under $5.00. Can I get a "woo-hoo"?!

I chose to handwrite the rest to give it a personal touch.  Play around with different types of lettering (cursive, all caps, etc.).

3. Decide on some embellishments. I was looking through my stash and saw these circular punch-outs (by Best Occasions - a FABULOUS kit). These punch-outs are typically used for tags, but I thought they'd double as balloons rather nicely. I hunted down some string in the black hole (oops, I mean garage) to finish off the balloon look. Here's a tip when using nylon string: after cutting, burn the edges a bit with a match to prevent fraying. Another tip: when it comes to embellishments, odd numbers always tend to be a bit more visually appealing, as well as using different sizes. 


4. As you can see from the very first picture, I put a patterned strip near the bottom of the card. The strip came from a regular piece of 12x12 patterned paper (trimmed to perfection by my trusty Fiskars)... and I liked how the circles and dots coordinated with the polka-dot balloon. There's no trick to perfectly laying out the elements on a card. You just have to play around until it looks good.  Rearrange things a few times before gluing them down. And if you happen to have someone else around, tell them you'll give them a free high five if they tell you their opinion (a free high five might just be the best gift ever).

5. For the inside of personalized cards, I always like to use a picture of me and the card recipient (so they'll ALWAYS remember my awesomeness). Give the photo some bling by adding a border/frame. The border for this photo came from the same Best Occasions kit.   


6. For the personal note inside the card, add some flair by using a large letter (an "M" for Mike). You can also add some snazzy buttons or borders (I added another black and white strip to the inside of the card at the very top).

7. THIS STEP IS KEY: For the personal note, I suggest using a totally separate piece of paper and cutting it to fit. That way, you can write your message and glue it to the inside of the card (use a glue dot roller cuz it's nice and flat). There's nothing worse than ruining your entire card by writing directly on the inside and messing it up in some way. 

What an amazing creation... and another satisfied customer!  Happy Birthday Mike!!


Do you make personalized cards? What's your favorite thing to add to cards to make them unique?

Friday, July 2, 2010

Flip Off Friday... Looking forward to the Fourth!


Another week that just fleeeeeeew by!  All in all it was pretty good... except for a few minor things... I am SO looking forward to the three-day weekend.  Friday Flip-Offs was created by Gigi at Kludgy Mom as a faaaaabulous way to rid yourself of the week's irritations, so you can properly enjoy the weekend.  Cheers, and here goes:

1. To the guy who scurried to get in front of me at Starbucks yesterday: FLIP OFF.  I may not need this coffee more than you do, but being one person closer to the front of the line is just ridiculous.  I tried to strike you dead with lightning bolt daggers coming out of my eyes, but you wouldn't even make eye contact with me!  Can I challenge you to a dual at 8:30 in the morning?

2. To my emotions: FLIP OFF.  You need to calm down, take a deep breath and relax!  The world is not coming to an end.  I've had it with your need to completely take over my sanity and cause useless drama.  Pull it together!

3. To Sally Hansen nail polish: FLIP OFF.  You have the capacity to make my nails long and beautiful *if* I didn't have this bad habit of peeling you off.  Why are you so easy to peel off?  Why is it so satisfying to peel you off?  Please just stay put.

4. To the FULL can of Dr. Pepper that spilled on my iPhone: FLIP OFF.  You thought you won, didn't you?  Ha ha, my new 4G is coming in the mail next week.

5. To the blogosphere: FLIP OFF (ok, not really, I love you.)  Why are you so addicting?  Why are you so consuming?  Why does every thought that goes through my head end up as a "I should blog about that" thought? 

It's your turn! 

HAPPY FOURTH OF JULY EVERYONE!  BE SAFE, ENJOY THE FIREWORKS, AND REMEMBER THAT WE LIVE IN THE MOST AMAZING COUNTRY IN THE WORLD!

Wednesday, June 30, 2010

TAG You're It! Easy instructions on journaling tags for beginner scrapbookers.

As promised.... here comes *easy as pie* directions on how to make a cute tag for journaling.


Step One: Type or write your journaling first... this helps you measure other things later.  Try using plain white or lightly colored paper (or something with a very faint pattern... we don't want to distract from all that poetry now, do we?)

Step Two: Pick out the patterned paper you want as the background for your tag.  I chose stripes... funky stripes to match funky argyle.

Step Three: Find a cute little button.  (BTW people: my favorite place to get buttons is from all those annoying little button envelopes that come with new clothes.  Before I started scrapbooking, I used to keep mine in a little drawer... with the Martha-Stewart-like intention of actually sewing a button back on if one happened to fall off.  Instant killer of button-sewing homemaker skills?  Safety pins!  So what do we do with the buttons?  Glue them on scrapbook pages.  *Applause please.*)

Step Four: Cut out your journaling into a rectangular shape and decide how much bigger you want the tag to be... it can be a subtle 1/4 inch border, or more decorative and bold with a 1 inch or larger border.  (Don't adhere the journaling to the patterned paper yet.)

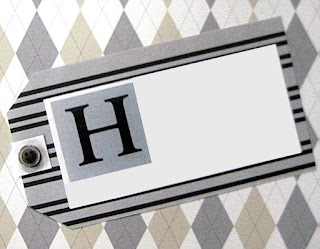
Step Five: Gently (without creasing) fold your patterned paper in half (hot-dog style).  Take some scissors and snip off the corners of one side at about a 45 degree angle.  The point of folding the paper is so the angles are identical.  I learned this the hard way.  Don't cut it all the way into a point; you're gonna want it to look like this:  


Step Six: Take a small snippet of the same paper you wrote your journaling on and cut a long skinny rectangle.  Use a glue dot to stick it on, leaving part of the rectangle hanging over the edge of the patterned paper, and then fold it around to the other side.

Step Seven: Use another glue dot to stick your button in the center of the rectangle from Step Five.  Adhere your journaling and you. are. done!

What do YOU like to use tags for?  Any other suggestions on techniques?


Beginner scrapbooking tip: I love using tiny tags to write the month and year.  This way, the tag doubles as a cute embellishment and will help jog your memory of when those photos were taken.

Tuesday, June 29, 2010

Pretty, Pretty Please.... with a Cherry on Top!

In this scrapbooker's very short time here in the blogosphere, I've had the good fortune to interact with some amazing women who blog about crafting, kids, recipes, housework, the joys of being a lady, life in general, etc.  I feel SO honored to have been given an award by Jessica at JessRaquel "Mo Shíorghrá".  So thank you, thank you, thank you!!!  A little bit of recognition goes a loooooooong way!


The rules for this award are:

1. Thank the person who gave this award to you
2. Copy the award and put it on your blog.
3. List three things which you love about yourself.
4. Post a picture you love.
5. Tag five people you wish to pass this award on to.

#1 & 2, check.  Here goes for #3:

* I love my green eyes.  They have tons of gold right in the center and are surrounded by a very dark olive green ring.
* I love that I have a way with words.  When I sit down at a computer, things tend to just pour out of me... and sometimes what I have to say even sounds poetic.  Some say a picture is worth a thousand words; I say a sentence is worth a thousand emotions.
* I love that I'm passionate, emotional, and never go down without a fight.  My friend Seth used to call it "flawless fire".... ahhh, love that.

Here we go for #4: This picture was taken when I did a modeling show for my friend Roxy.  This dress fit me like a glove!  I felt like a princess!


And for #5: Here are just a few of the amazing bloggers I've interacted with over the past month.  This award is for you ladies!

More on scrapbooking in a few short hours... stay tuned, pretty please!

Monday, June 28, 2010

Accolades for Argyle - Scrapbook Pages that Dress to Impress

Mommy Marsha is going to be soooo proud of how serious her two boys are when getting their photo taken! =)

Here's a fantastic way to make pages personal and particularly memorable.  Think about a page you want to make to highlight a person... Perhaps for their birthday.  Now think about that person's favorite color or something they like to wear.  Now walk, waddle, rollerskate, or drive to your nearest craft store and pick out some unique paper. 


I did a two page spread to highlight two birthday parties for two fantastic brothers.  Guess what?  They both love argyle.  Ben, the older brother, loves argyle sweaters.  Matt, the younger brother, loves argyle socks.  Both of these men rock argyle like nobody's business.  They wear it loud, they wear it proud.  So young grasshopper, what would be the perfect paper for these men?  You guessed it.  ARGYLE.  And guess what else, they both said, "Hey, argyle paper!" when they checked out this layout.  Duh boys.  Major duh.  (But secretly, I was *very tickled* that they noticed.)

Tomorrow, check out more tips for these layouts... including my first attempt with stamps (yikes!) and how to turn a rectangle, button, and glue dot into a cute tag for journaling.

Beginner scrapbooking tip: The more pages you make, the more it'll seem like time just sorta blends together.... so make sure to write the date and year somewhere on your page.  In 50 years, you'll be glad you did!

Friday, June 25, 2010

It's fun to be an idiot... no one holds you accountable for, well, anything!

A Beginner's Guide to Essential Scrapbooking Materials
(This is me being stressed over my idiotness.)
Friends.... silly me.  Here I am on my merry blogging way, writing all kinds of fun (IMHO - in my humble opinion) posts about scrapbooking.  However, I have yet to post a somewhat comprehensive, totally subjective list about which supplies a beginner scrapbooker needs.  Well, I did actually do that here, but there wasn't a whole post dedicated to it. 

I got an email from Jessica - who writes a blog I read religiously, JessRaquel "Mo Shíorghrá", and she asked me for my suggestions on what to purchase.  So she gets the credit for this worthwhile post...

If it's your first trip into the black hole of the crafting world, TAKE A LIST.  I can't stress that enough... oh and maybe give yourself a time limit.  The "I'm just gonna browse for 10 minutes" turns into "Oh my goodness, why is my credit card getting declined, AGAIN?"

Here are my *essential* suggestions... stay tuned for suggestions regarding what to get *after the essentials* and for suggestions regarding *don't even think about it until you're a pro*.  (And let me apologize for being an idiot and not doing a post like this sooner... in the future, you can reference lists like this one on my page Scrapbooking Musts.)

1. Definitely buy a kit. Michael's Craft Stores has tons of them... they contain coordinating paper, embellishments, and a scrapbook with 10 page protectors (which will give you 20 layouts front and back). The best thing about kits is that you'll be able to see what type of embellishments you like to work with and then you can buy more of those, and you'll have lots of things that are automatically coordinated with each other. Some kits also come with layout ideas.  The one below is from K & Company and can be purchased on Scrapbuck.com for $9.00!!! For ideas on how to make layouts once you have your kit, check out Scrapbooking Kits & Coordinating Paper.


2. Get a good paper trimmer. I like the one by Fiskars... it can be purchased on Amazon for $14.50.  If you want to read more about my love affair with Fiskars, and for tips on how to use it, check out why Fiskars are Your Friends.


3. Get a glue dot roller. I like the one made by Scotch because it's sticky enough to "stick" - but if you have an "oh, shit!" moment, you can still safely pull the item off the page. You can also get larger glue dots which are more heavy duty.  I suggest a dot roller versus the adhesive square rollers... those tend to get alllll tangled up which, frankly, makes me want to pull my hair out.  You can buy this one for about $11.00.


4. Get a skinny black marker/pen for journaling. I like the fine tip Sharpies.


5. For free layout designs, visit scrapbooksetc.com -- they have tons of ideas. I spent about $30 on a book (but not the book I reference below... that book is WELL worth the money!) and wish I'd just done some hunting on the web first.  But if you really are looking for a book that will give you inspiration, be sure to pick up 52 More Scrapbooking Challenges.
 

I would LOVE to hear your suggestions and perhaps add them to my list!  So tell me, what did you buy when you were first starting out?

And BTW... none of these companies/people paid me to endorse these products, nor did they send me any free gifts.  I'm just blogging about them because I like them.  So there.

Tuesday, June 22, 2010

5 Reasons Why Ribbons Make Fabulous Embellishments


This year I turned 29...  And you know what?  It actually sorta feels like I'm either still 16 or turning 16 again.  Turning 29 made me realize (well, actually, scrapbooking and journaling about my 29th birthday made me realize) that I am still basically the same girl I was at 16.  I still want frozen yogurt at 10:00 a.m.; I still sing when I'm alone in my car.... At. The. Top. Of. My. Lungs.; I still paint my nails blue, blue, blue; and I still cry like a girl, just because I can.

And you know what else?  Using pretty ribbons and sparkly sequins as embellishments makes me feel pretty good, too.  Here are my TOP 5 reasons why ribbons are a fabulous embellishment.