Showing posts with label novice tips. Show all posts

Tuesday, August 24, 2010

Discreet Journal Pockets for Beginner Scrapbook Pages

On Valentine's Day this year, Matt's mom asked her kids write "love-grams"... She hired this hilarious actor to come to dinner dressed as a cupid and sing love songs and distribute the love-grams.  I kept the love-grams that Matt & I received, knowing that they would make a really great scrapbook page addition (and to help jog my memory of that awesome evening).  Thanks Marsha, for being a wonderful host and putting it all together!


If you remember from my post "Scrapbook Kits & Coordinating Paper", I discussed velum tear-outs as one way to create a title.  In this layout, I took that idea one step further and created a pocket to hold those love-grams.  Here is the two-page spread (grrrr... I obviously had not yet learned my lesson about being a beginner scrapbooker and the difficulty of two-page layouts).  Instructions for the pocket are below.


The other details of this page are pretty basic, so let's focus on the vellum pocket.  (BTW:  Vellum is slightly transparent, foggy looking paper that can be plain, or, in the scrapbooking world, come with cute pictures or sayings.)


1. I picked up a spiral book of vellum quotes at Michael's (approx. $7).  They have books for all occasions.  It's also smart to buy vellum tape which allows you to adhere the vellum paper without the adhesive showing through (approx. $4).
2. I picked a coordinating paper (for beginner coordinating paper tips, see Scrapbook Kits & Coordinating Paper) to serve as the back of the pocket. 
3. Measure how big the front of the pocket needs to be based on what needs to go inside.  Make sure you leave some flaps to wrap around the two sides to the back, and fold under the bottom.  Use your trimmer accordingly.  Crease the flaps well.
4. Finally, adhere the flaps to the back of the pocket using your choice of adhesive (note: vellum tape is not necessary here because the part that you are adhering will be on the unseen backside of the pocket).  Insert love-grams or any other special note!

To finish of the page, I added heart shaped embellishments and journaling in the center (made using a circle-cutter and by sewing a ribbon around the circle... more on those techniques later.)


Beginner scrapbooking tip: Pockets are a creative spot to discreetly place notes or journaling that has special meaning, and perhaps that you don't necessarily want everyone to read.

Thursday, August 19, 2010

Black & White & "Read" All Over: Simple but bold cards for beginners.


Try making a card using a photo(s) on the front.

I made this card for my sweetie for our anniversary... Here's to one year... and many more to come.  I wanted the card to be elegant, dramatic, and to make a bold statement.  And considering the recipient is a dude, I decided flowers and butterflies might not be appropriate. 

I lightened the exposure a bit on this picture using Picnik, but it didn't show up too well when I took a picture of the card with my iPhone, but you get the idea.  The black background with a bright photo gives some nice contrast.

Obviously this is the same photo, but I printed it twice and chopped part of our heads off.  It feels sorta weird cutting your own face in half. 

I like to make the text of my cards simple.  Hallmark has tons of cards with beautiful language, but in the end, don't you really just want to say "I love you. I mean it."?  That's the point.  I love you.  I mean it.  There you have it.  Done deal.  Finito. 


BTW, I got the idea for this card from Lizzy Kartchner's book 52 More Scrapbooking Challenges.  It's my absolute fav.  She had the suggestion of printing the same photo twice... brilliant!

More simplicity and black/white was in order for the inside of this card.  I wrote the gushy stuff on the inside of the card, which is for Matthew's eyes only... but I also put a cute little tag with our "love date". And, always a fan of repetition, I added another bold statement in the same font as was used on the front.


June 15, 2009:  That was a really good day.

Wednesday, August 18, 2010

Fancy Photo Borders for Beginner Scrapbookers

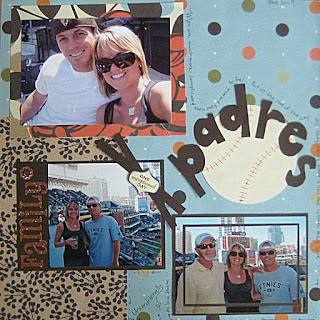
One of the ways novice scrappers can begin fancying up their pages is by creating cool borders and mats for photos. This next page showcases an awesome day at the Padres game with my three favorite guys: Matthews, my dad, and my brother.
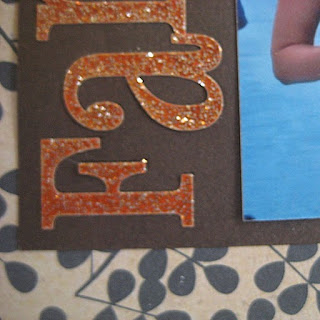
The beginner kit that I bought included some fun stickers (see the "family" sticker). I really wanted this sticker to stand out on the page, but it sorta blended in with the other colors that were on the background and block papers. So I decided to extend the dark brown photo mat on one side in order to accomodate the sticker... easy, but so effective!

The next border I did was a little trickier. Now normally, I don't measure my photo mats to precisely fit the photo -- I'm just not that patient. "Eyeing" it usually works just fine. But for this mat, I had to measure because I was actually cutting the photo. Here are the steps:

1. Measure 1/2" around all sides of the photo and draw a connecting line on the back of the photo (ends up looking like a box).
2. Measure another 1/8" from where the line is towards the middle of the photo and draw another line (now you've got one box inside the other).
3. The space you have between the two boxes is what you'll be cutting out.
4. Use your trimmer to cut on the lines - being extra careful to keep the outer border in tact.
5. Select how much of the mat you'd like to extend beyond the photo (then trim the mat accordingly) and use your glue dots to stick in place. Tada!
6. If you are a measurer by nature, follow this link for some fantastic tips: http://scrapbookingforbusymoms.blogspot.com/

Finish up the page with some "home-grown" embellishments -- like having your artistically-inclined boyfriend draw a baseball for you, hand-drawing bubble letters old-school style and cutting them out (yes, I know some of the pen lines are visible), and use that left over brown mat paper to make a cute "x" shape behind a pre-cut dimensional sticker.


Novice tip: Many of the other fabulous blogs out there are for more advanced scrappers who have invested quite a bit of money into die-cut machines and the like. For us novices, if we hone in on some of those scissoring and lettering techniques we learned in grade school, we can actually end up with some pretty cool looking layouts... and for a fraction of the price. Being the impatient Aries that I am (year of the Rooster, too... I'm doomed), I'm always in a hurry to have all the "stuff" needed for decadent layouts. But I think any scrapper would agree, using whatcha got aint all that bad either!
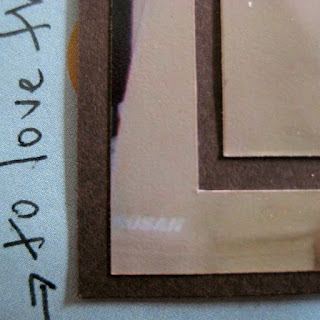
Another novice tip: Journalling doesn't have to take place in a conventional box. On this page, I scrawled some thoughts and wrapped them all around the page.

Thursday, August 12, 2010

So many mistakes, so little time... Embracing mistakes as a beginner scrapbooker

Oopsie daisy.


I made so many mistakes on this page.  Can you tell?  Here, I'll point them out to you and show you how I covered them up... or didn't, in some cases.

First of all, I made this page for my mini-scrapbook dedicated to Bunny.  That scrapbook is tiny, like 5"x5".  So how big did I make this page?  8"x8", because duh, an 8 inch page will for sure fit into a 5 inch sleeve.  Not so much, actually.  So, now I need to make it into a 12x12 page, but that's for another day.

2nd mistake: I used a little black marker to trace the scalloped edge and I went out of the lines twice.  I'd for sure be kicked out of 1st Grade for this type of error.  But *tada*!  I covered up the mistake using a heart! 


3rd mistake: I used an edge puncher for the photo mat and have QUITE obviously not mastered the skill of making the corners match up.  I didn't fix this mistake.  I.didn't.even.try.so.there.


I also went out of the lines on the bottom scalloped edge.  Let's highlight that mistake with a big yellow arrow.  Quick fix: put a flower stem close to the mistake... sorta like the "taking your eye off the ball" theory.  In law, we call that a red-herring.  (Gagging that I know what that means, and gagging that I used a legal expression on a scrapbooking blog.)


So people.  The short but sweet lesson for today: Embrace mistakes, hide mistakes, don't hide mistakes, whatever you do with them, mistakes are part of what makes paper scrapbooking unique.  I never said I was perfect.  But, if you were thinking I was, just stay in that dreamland... it's a warm, happy place... I'm there myself.


Today I'm linking up with Christine at MBC Scrapbooking!


Thanks for hosting a crafting link party, Christine!  Please link up if you have a craft or DIY project.  Don't forget to add Christine's button!!  Happy Thursday =)

Wednesday, August 11, 2010

{Squiggly brackets}..... mysterious, magical, monumental symbols for beginner scrapbookers


Can anyone please tell me what these things are called?  {  }
Are they brackets?
Parentheses?
Squiggly vertical lines?

Hold please, I'll ask Google.

(returning three minutes later)... Here is what Wikipedia says: curly brackets, squiggly brackets, definite brackets, swirly brackets, birdie brackets, Scottish brackets, squirrelly brackets, braces, or gullwings: { }

Whatever you choose to call them, they are used A TON in the scrapbooking world.  I wasn't quite sure what made them so damn important until I created the layout above.

The photos were perfectly in place...

I had my title and letters all picked out...

I knew I wanted to create a little flower garden in the bottom corner...


But there was no cohesion between the title and the rest of the elements... (back to Google for a definition of cohesion: [kəʊˈhiːʒən] n. the act or state of cohering; tendency to unite)

It then occurred to me that I needed some way to frame the title of the page (queue music and enter squiggly bracket things stage left)


I don't know why squiggly bracket things are so magical, but they pretty much are the cat's meow, the unicorn's horn, the best thing since sliced bread.  They have a strange way of bringing it all together when something just seems to be missing.  Give them a try... you'll be hooked on the squiggles faster than the disappearance of Coach purses at a 50% off outlet sale...
...and here are a few more layout pics, for the die hard fans.


Sunday, August 8, 2010

Best.Organizer.Ever: A beginner scrapbooker's dream.

For months I've searched for the perfect embellishment/tools/everything else organizer.  Friends, I have finally found one.  It's by Creative Options (who are not paying me to review this product, nor did they send me any swag) and it's basically a tackle box on crack. 


It's a multi-tiered self-contained box, sturdy but also light enough to carry around.

The main compartment contains three shelves which each house a smaller plastic organizer with compartments that can be altered to your needs.  Here is what the inside of each smaller orgainizer looks like...

Ribbons, ribbons, ribbons...

Letters, letters, letters...

Tape, buttons, and pens. 


And on the top, there is another large compartment for miscellaneous larger items that don't fit in the smaller units. 


Love, love, love.

Seriously. 

After much online searching, mental anguish, and overall hand-flapping, I found this little gem.  The website lists several retailers, or you can purchase online through Amazon.  But I wanted to see it for myself before making the purchase.  One day, I went wandering into Michaels (okay, so actually I drove several miles off the beaten path, on purpose) and right there in the front of the store, on the first shelf you see in the dead center, was the case.  And then (can I get an Amen?) I saw a 40% off sign.  I immediately ran over to the clerk and asked her to pinch me, I was for sure dreaming.  But nope.  I was just experiencing a rare moment of shopping bliss when you find the perfect item and IT'S ON SALE.  My debit card has never been swiped faster. 

THEN, I got to go home and dump out all my stuff all over the place and *RE-ORGANIZE* it all.  Cue angels singing and light shining down from heaven. 

This beginner scrapper has arrived!

Thursday, August 5, 2010

Inflatable collars, power tools, and one determined chihuahua: story-telling through scrapbooking.


Scrapbooking has to be one of the very best ways to tell a story.  Imagery combined with words, some fancy paper, and embellishments... really, what could be better?   The lesson for today: think of a story you'd like to tell and create a layout that illustrates that story.  I promise, you'll NEVER forget it.  Here's my example.

This layout tells the story of little Miss Bunny whose greatest goal in life is to sneak out of the gate and run free, as nature intended.  The gate at our house used to be suspended several inches from the ground and the bottom was unfinished... resulting in scary dagger-like poles which Buns would nearly impale herself on every time she squeezed under that gate to chase after another dog or small child.  Vicious chihuahua!

Matthews, who loved Buns the moment he met her, decided it was time to fix the gate.  Here is why Matthews is amazing: He first dismantled part of the gate to take to the hardware store so they could match the paint.  Then he bought a long piece of aluminum, used a spray gun to paint it, and then sawed it to the perfect length to cover the unfinished bars at the bottom.  All the while, Bunny looked longingly out the gate, knowing her days of running free would soon be over.


KeKe (me) has known the Buns for seven and a half wonderful years.  I am not fooled by that sausage-like physique.  I know that she can turn herself into a flattened pancake in 0.2 seconds if she wants to pull a Houdini.  I said to Matthews, "I'm pretty sure she'll be able to fit under  it still..."  "No, no," he reassured me, "this will do the trick."  But alas, just as we were installing the final screws, another dog walked by and Bunny showed Matt what she's made of (which is Silly Putty, apparently).  The look on Matthew's face was priceless... but not quite as priceless as the photo of him holding the paint gun...


Ooooh, such a scary man with those power tools.  So, after Bunny slid under the newly modified gate, we did what any smart human would do: we took BOTH gate doors off the hinges and lowered them by about three inches.  Take that, Bunny!  With the gate now sitting literally centimeters from the ground, we knew, we just knew, there was NO way she was squeezing under it.  Silly humans.  Bunny, apparently, can also squish her skull and shoulders and fit THROUGH the gate.  You have got to be kidding me.  I had no idea this dog had so much talent.  We sat on the other side of the gate and tempted her with a few Cheerios (her favorite treat, BTW) and she sailed through the gate like a dainty mid-leap ballerina. 

I appropriately named this layout "The Great Escape".


These past few months, we've had to keep a watchful eye over BunBun, knowing that even with the gate shut, she could leap through.  The only thing that surprises me is that she doesn't try to jump right over the top of the gate!  The final solution, an inflatable dog collar, turned out to be the simplest... and may have saved us from going through all the commotion to fix the gate.  But hey, it makes for a great scrapbook layout, right!? 

Here's is a fabulous photo of Buns in her inflatable collar, and Matt, in a make-shift inflatable collar (so that Bunny has a sympathetic fellow fashion victim, of course).


Don't you just love a story with a happy ending?

Tuesday, July 27, 2010

Inking Edges: Stamp-free, ink-initiation for beginner scrapbookers.


Inking the edges of your photo mats can add a nice finishing touch.  Here are some things I've learned about ink:
  • Ink pads don't necessarily only accompany stamps... I use ink pads often without bringing out the stamps.  Stamps are tricky, mean little buggers.  They look awesome but require lots of skill.  More on that in a minute.
  • Ink pads are cheap and come in tons of colors.
  • Ink is messy, messy, messy... so make sure to watch what else you touch and wash your hands --- otherwise you'll end up with smudges and smears.  Boo to smudges!
So without further ado, let me introduce you to this beginner scrapbookers take on "inking" techniques.  Inking the edges of the colored mats on this page gives it a nice popping-effect, especially in the case of red on red.  At the time I made this layout, I didn't have black ink (well, I bought an ink pad that looked black, but it turned out to be purple), so I used blue instead.  Gosh I'm good at improvising!

What you do is press the edge of the paper directly onto the ink pad.  This is going to give you a nice thin border of ink.  If you want the "sprayed" look (see below), gently press the surface of the paper onto the pad.  You can use your fingertips to press the paper onto the pad... light pressure for a bit of color, more pressure for more dramatic color.


I highly recommend testing this out a few times.

I also highly recommend waiting to adhere your photos until after you ink the edges.

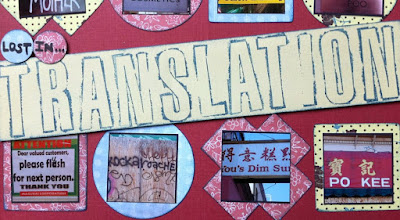
Here's a close up of the title, which I stamped with individual letters...


I'd like to publicly congratulate myself on this majestic title.  It took me six (I'll repeat that: SIX) times before I got it right.  Stamps are soooo cool looking and in theory they're easy (especially now that they have clear stamps that you temporarily adhere to a clear block, making it easier to see where the image is going to end up).  So yes, how hard could it really be?  Well for me, the challenge comes in not knowing how hard to press and not knowing whether the ink will be even. 

Pleeeeease practice before stamping!  Impatient KeKe doesn't believe in looking before you leap.  Many-a-time I've skipped the directions on the hair dye box that suggest testing out the color on an "unnoticeable" strip of hair (consequently ending up sporting a hat for a few weeks).  But when it comes to ink and stamps, practice makes perfect.

Beginner scrapbooking tip:  Try making a layout using photos that don't have any people.  This layout is a compilation of photos (most were taken downtown San Francisco) that have funny sayings or misspellings.  You could do a layout of pictures of things you collect... I'm thinking about doing a layout of all my stilettos. =)

Monday, July 26, 2010

Angle-licious! Tilting your way to beautiful beginner scrapbooking layouts.


Remember how I said asymmetry is the new black?  Well, I meant it.  And tilting is the new asymmetry.  Are you confused yet? 

Here's the beauty of asymmetry and tilting: they can make a layout look really fancy and you don't need to use a lot of embellishments in order to get a really dynamic look. This tilted layout idea was suggested in 52 More Scrapbooking Challenges.

For this layout, I used one large piece of brown paper to mat all three photos.  The photos themselves are aligned straight on the brown paper, but the brown paper is tweaked just a bit on the pink paper.  To compliment the angle of the brown paper, I snipped off long skinny triangles. 


You can see that after I cut the triangles, I set them away from the rest of the brown paper just slightly.  If you are using a paper that has a pattern on it, make sure to line the pattern up when you glue down your triangles. 

These photos make me realize how lucky I am to have such an amazing family.  The pictures were taken by the San Diego Harbor and we went to see Nora Jones in concert later that evening.  (Nora Jones, BTW, is incredible live.)  I loved, loved, loved that evening.  *Ahhh, tear.*

Okay, enough with the sentimentality.  Scrapbooking isn't for the faint-hearted. ;-)
  
Try angling some of your other items, too.  The title (see above) is diagonal, as are the journaling tags.


Finalize with some embellishments.  Again, the focus on a layout like this one is the tilting... you don't want to detract from your amazing angle work with a bunch of embellishments, do you?  No.you.do.not.young.grasshoppa.  Embellishments can truly come from anywhere... Buttons (which are my favorite) tend to always accompany new clothes.  I don't know about you, but I typically don't just randomly lose buttons on clothes, so I have a huge stash of them.  Plus, they are super cheap to buy from craft stores... or you can just go shopping and buy a bunch of new clothes - for the sake of acquiring buttons, of course.  I also took apart some awesome 80's earrings (courtesy of mama Jacque) and glue-dotted those bad boys right next to the buttons.  Simple but chic.  Just my style.


So what do you think?  Do you like the angled look? 

Friday, July 23, 2010

Dream a Little Dream: Title inspiration for beginner scrapbookers


There are many ways to find the perfect title... Sometimes it's as simple as stating the event you are scrapping about.  Sometimes it can be a person's name (someone who appears in the photo, that is... I thought about doing a layout about Matthew and titling the page "Bob", but that just seemed weird)... uh.oh.Friday.humor.  So sorry.

Sometimes the title immediately comes to you, just from looking at the picture(s) or the way it makes you feel.  But sometimes it takes a little longer.  My suggestion for when that happens is just to begin your layout and let the inspiration for the title come to you as the page develops.


I had lots of different ideas for the title of this page.  A few of them were: "Shhhh...", "Nap-time", and "My BunBun".  None of them seemed to fit and I almost had a temper tantrum in the middle of this layout --- partly because of the title issue, partly because I tried my "cut your paper with a craft knife" technique and it turned out awful.  I crumpled up the paper and counted to ten.  Ahhhhh, that's better.

So I continued on my merry scrapbooking way and kept noticing little Bunny's outstretched paw.  She was only about 4 months old when this photo was taken (she's a grumpy 50-people-years/7-dog-years old lady now).  I imagined the wonderful puppy dreams she must have been having and ta-da!  Perfect title bliss!


Here's my tidbit of creativity for the day: Titles don't only have to be in one place on the page.  I was so excited when I came up with the title for this layout that I wanted to plaster it all over the place.  I even added some sparkles that reminded me of stars.


Don't forget your journaling and other embellishments after you're done congratulating yourself on the genius title you came up with.

What's your technique for coming up with a title?  Any favorites?