Thursday, August 19, 2010

Black & White & "Read" All Over: Simple but bold cards for beginners.


Try making a card using a photo(s) on the front.

I made this card for my sweetie for our anniversary... Here's to one year... and many more to come.  I wanted the card to be elegant, dramatic, and to make a bold statement.  And considering the recipient is a dude, I decided flowers and butterflies might not be appropriate. 

I lightened the exposure a bit on this picture using Picnik, but it didn't show up too well when I took a picture of the card with my iPhone, but you get the idea.  The black background with a bright photo gives some nice contrast.

Obviously this is the same photo, but I printed it twice and chopped part of our heads off.  It feels sorta weird cutting your own face in half. 

I like to make the text of my cards simple.  Hallmark has tons of cards with beautiful language, but in the end, don't you really just want to say "I love you. I mean it."?  That's the point.  I love you.  I mean it.  There you have it.  Done deal.  Finito. 


BTW, I got the idea for this card from Lizzy Kartchner's book 52 More Scrapbooking Challenges.  It's my absolute fav.  She had the suggestion of printing the same photo twice... brilliant!

More simplicity and black/white was in order for the inside of this card.  I wrote the gushy stuff on the inside of the card, which is for Matthew's eyes only... but I also put a cute little tag with our "love date". And, always a fan of repetition, I added another bold statement in the same font as was used on the front.


June 15, 2009:  That was a really good day.

Wednesday, August 18, 2010

Fancy Photo Borders for Beginner Scrapbookers

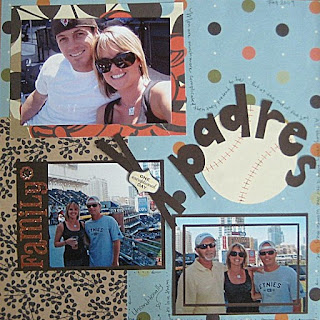
One of the ways novice scrappers can begin fancying up their pages is by creating cool borders and mats for photos. This next page showcases an awesome day at the Padres game with my three favorite guys: Matthews, my dad, and my brother.
The beginner kit that I bought included some fun stickers (see the "family" sticker). I really wanted this sticker to stand out on the page, but it sorta blended in with the other colors that were on the background and block papers. So I decided to extend the dark brown photo mat on one side in order to accomodate the sticker... easy, but so effective!

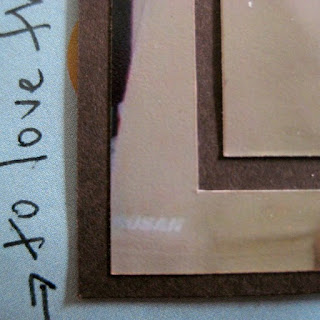
The next border I did was a little trickier. Now normally, I don't measure my photo mats to precisely fit the photo -- I'm just not that patient. "Eyeing" it usually works just fine. But for this mat, I had to measure because I was actually cutting the photo. Here are the steps:

1. Measure 1/2" around all sides of the photo and draw a connecting line on the back of the photo (ends up looking like a box).
2. Measure another 1/8" from where the line is towards the middle of the photo and draw another line (now you've got one box inside the other).
3. The space you have between the two boxes is what you'll be cutting out.
4. Use your trimmer to cut on the lines - being extra careful to keep the outer border in tact.
5. Select how much of the mat you'd like to extend beyond the photo (then trim the mat accordingly) and use your glue dots to stick in place. Tada!
6. If you are a measurer by nature, follow this link for some fantastic tips: http://scrapbookingforbusymoms.blogspot.com/

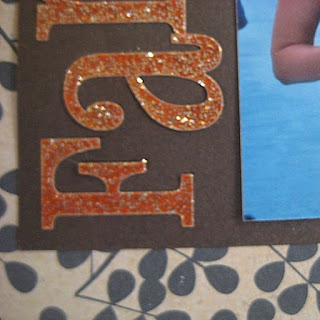
Finish up the page with some "home-grown" embellishments -- like having your artistically-inclined boyfriend draw a baseball for you, hand-drawing bubble letters old-school style and cutting them out (yes, I know some of the pen lines are visible), and use that left over brown mat paper to make a cute "x" shape behind a pre-cut dimensional sticker.


Novice tip: Many of the other fabulous blogs out there are for more advanced scrappers who have invested quite a bit of money into die-cut machines and the like. For us novices, if we hone in on some of those scissoring and lettering techniques we learned in grade school, we can actually end up with some pretty cool looking layouts... and for a fraction of the price. Being the impatient Aries that I am (year of the Rooster, too... I'm doomed), I'm always in a hurry to have all the "stuff" needed for decadent layouts. But I think any scrapper would agree, using whatcha got aint all that bad either!
Another novice tip: Journalling doesn't have to take place in a conventional box. On this page, I scrawled some thoughts and wrapped them all around the page.

Monday, August 16, 2010

A little faith...


Sometimes you gotta just have a little faith... I'll take a lesson in faith from sweet Bun Bun, perched in the bicycle basket, high, high, high above the ground. 

I need some faith right now... Faith that my life path is headed in the right direction... Faith that every dark moment leads to something light... Faith that the universe is aligning the way it should... Faith that I'll never forget lessons of humility.

So I'll learn from my Bunny, I'll perk up my ears, I'll keep my eyes open for what lies ahead, and I'll be sure to hold on tight, because it might be a bumpy ride.


Faith, hope, love.
~ KeKe ~

Sunday, August 15, 2010

So many mistakes, so little time... Embracing mistakes as a beginner scrapbooker

Oopsie daisy.


I made so many mistakes on this page.  Can you tell?  Here, I'll point them out to you and show you how I covered them up... or didn't, in some cases.

First of all, I made this page for my mini-scrapbook dedicated to Bunny.  That scrapbook is tiny, like 5"x5".  So how big did I make this page?  8"x8", because duh, an 8 inch page will for sure fit into a 5 inch sleeve.  Not so much, actually.  So, now I need to make it into a 12x12 page, but that's for another day.

2nd mistake: I used a little black marker to trace the scalloped edge and I went out of the lines twice.  I'd for sure be kicked out of 1st Grade for this type of error.  But *tada*!  I covered up the mistake using a heart! 


3rd mistake: I used an edge puncher for the photo mat and have QUITE obviously not mastered the skill of making the corners match up.  I didn't fix this mistake.  I.didn't.even.try.so.there.


I also went out of the lines on the bottom scalloped edge.  Let's highlight that mistake with a big yellow arrow.  Quick fix: put a flower stem close to the mistake... sorta like the "taking your eye off the ball" theory.  In law, we call that a red-herring.  (Gagging that I know what that means, and gagging that I used a legal expression on a scrapbooking blog.)


So people.  The short but sweet lesson for today: Embrace mistakes, hide mistakes, don't hide mistakes, whatever you do with them, mistakes are part of what makes paper scrapbooking unique.  I never said I was perfect.  But, if you were thinking I was, just stay in that dreamland... it's a warm, happy place... I'm there myself.


Today I'm linking up with Christine at MBC Scrapbooking!


Thanks for hosting a crafting link party, Christine!  Please link up if you have a craft or DIY project.  Don't forget to add Christine's button!!  Happy Thursday =)

Friday, August 13, 2010

Flippin Off and Feeling Good!


Friday the 13th... just a perfect way to start the weekend.  I personally am going to wear a crash helmet and mittens all weekend, for safety sake of course.

Gigi from Kludgy Mom, you have created a gift that keeps on giving... weekly therapy that costs nothing but a few keyboard strokes.  Thank YOU!

For readers from Creating the Hive: I'm still working on figuring out if Blog-Hops are possible through the Hive, but until then, please leave your Flip Offs and your blog link in the comments section on the Hive post... or visit Kreate by KeKe or Kludgy Mom for the link code.

And now for the flips...

1) To my healthy 2-espresso-shots-per-morning addiction:  You didn't fail me yesterday, did you?  I didn't have you by 8:30 a.m. and my head felt like it was going it implode.  You're demanding and a real pain in the you know what.  Flip off for being such a necessary evil.

2) The laundry pile... that's seeping, no spewing over the basket, onto the floor... essentially, I have laundry crawling up every wall in my house.  I hate laundry.  I detest it.  I always have.  I always will.  Flip off.

3) People who talk on their cell phone while driving but use the "speaker" setting and think it's "hands-free".  Folks, if you have to still hold your phone in your hand, it does NOT matter that it's on speaker.  Where are the police in this great state of California to give you a $350 ticket?  Better yet, why don't you learn the law and FLIP OFF.

4) While we're on the subject of drivers, the carpool lane is for carpools.  You sneaky, sneaky people who have no passengers but still use the all coveted carpool lane can FLIP OFF.  I'm just mad because I know if I tried to do it, I'd get caught. Boooooo!

Okay I'm feeling MUCH better!  Please link up and have a wonderful weekend!

Thursday, August 12, 2010

So many mistakes, so little time... Embracing mistakes as a beginner scrapbooker

Oopsie daisy.


I made so many mistakes on this page.  Can you tell?  Here, I'll point them out to you and show you how I covered them up... or didn't, in some cases.

First of all, I made this page for my mini-scrapbook dedicated to Bunny.  That scrapbook is tiny, like 5"x5".  So how big did I make this page?  8"x8", because duh, an 8 inch page will for sure fit into a 5 inch sleeve.  Not so much, actually.  So, now I need to make it into a 12x12 page, but that's for another day.

2nd mistake: I used a little black marker to trace the scalloped edge and I went out of the lines twice.  I'd for sure be kicked out of 1st Grade for this type of error.  But *tada*!  I covered up the mistake using a heart! 


3rd mistake: I used an edge puncher for the photo mat and have QUITE obviously not mastered the skill of making the corners match up.  I didn't fix this mistake.  I.didn't.even.try.so.there.


I also went out of the lines on the bottom scalloped edge.  Let's highlight that mistake with a big yellow arrow.  Quick fix: put a flower stem close to the mistake... sorta like the "taking your eye off the ball" theory.  In law, we call that a red-herring.  (Gagging that I know what that means, and gagging that I used a legal expression on a scrapbooking blog.)


So people.  The short but sweet lesson for today: Embrace mistakes, hide mistakes, don't hide mistakes, whatever you do with them, mistakes are part of what makes paper scrapbooking unique.  I never said I was perfect.  But, if you were thinking I was, just stay in that dreamland... it's a warm, happy place... I'm there myself.


Today I'm linking up with Christine at MBC Scrapbooking!


Thanks for hosting a crafting link party, Christine!  Please link up if you have a craft or DIY project.  Don't forget to add Christine's button!!  Happy Thursday =)

Wednesday, August 11, 2010

{Squiggly brackets}..... mysterious, magical, monumental symbols for beginner scrapbookers


Can anyone please tell me what these things are called?  {  }
Are they brackets?
Parentheses?
Squiggly vertical lines?

Hold please, I'll ask Google.

(returning three minutes later)... Here is what Wikipedia says: curly brackets, squiggly brackets, definite brackets, swirly brackets, birdie brackets, Scottish brackets, squirrelly brackets, braces, or gullwings: { }

Whatever you choose to call them, they are used A TON in the scrapbooking world.  I wasn't quite sure what made them so damn important until I created the layout above.

The photos were perfectly in place...

I had my title and letters all picked out...

I knew I wanted to create a little flower garden in the bottom corner...


But there was no cohesion between the title and the rest of the elements... (back to Google for a definition of cohesion: [kəʊˈhiːʒən] n. the act or state of cohering; tendency to unite)

It then occurred to me that I needed some way to frame the title of the page (queue music and enter squiggly bracket things stage left)


I don't know why squiggly bracket things are so magical, but they pretty much are the cat's meow, the unicorn's horn, the best thing since sliced bread.  They have a strange way of bringing it all together when something just seems to be missing.  Give them a try... you'll be hooked on the squiggles faster than the disappearance of Coach purses at a 50% off outlet sale...

...and here are a few more layout pics, for the die hard fans.